New Construction Home

Building a Deck on a New Construction Home: What to Consider

Highlights from this Article:

  • The earliest you should schedule a deck quote on a new construction home is once Tyvek is up — but waiting until the exterior is fully finished gives a much clearer picture of what you’re working with.
  • You need a certificate of occupancy before a deck contractor can apply for a zoning approval or building permit. That typically means waiting until after closing.
  • New construction soil is disturbed soil. Footings need special attention, and the relationship between your deck builder and your landscaper matters more than most homeowners expect.
  • HOA requirements apply in virtually every new subdivision — and if you’re one of the first homes in the development, the builder may still be running the HOA during the Declarant Control Period.
  • Getting HOA approval does not mean you’ve satisfied your builder’s warranty requirements. These are two separate things, and conflating them is a costly mistake.
  • Think carefully about the long game: a deck that fits your life today may not fit your life in five years. The best time to plan for a gas line, a future pergola, or aging-in-place access is before the deck goes in.

Skip down to the FAQs.

Moving into a brand-new home is one of those moments where everything feels full of possibility. The lot is a blank canvas. A deck feels like the natural next step. Building a deck on a new construction home is absolutely doable, and in many ways it’s an ideal time to do it. But new construction introduces a specific set of considerations that don’t come up when you’re replacing an old deck on an established property. Here’s what we’ve learned from building decks on new construction homes throughout Washtenaw County.

When Can You Get a Quote, and When Can Work Begin?

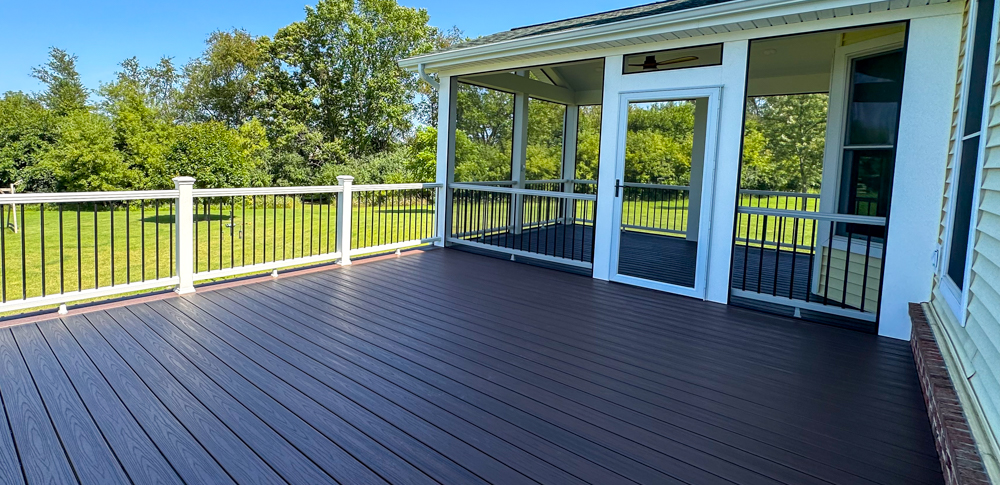
No need to wait until construction is complete to start the conversation. Once Tyvek is up, we can begin discussing the project and work toward a preliminary design and cost estimate. We’ll want to revisit and confirm details once the exterior is finished. We need to see where HVAC condensers, dryer vents, water spigots, electrical meters, and other exterior penetrations are located, since all of these affect both where the deck can attach and what obstacles exist within the deck footprint. The ledger connection also can’t be fully evaluated until exterior cladding is on. Basement windows are easy to overlook at the quoting stage but matter for natural light, and a walk-around of the nearly-finished home sometimes changes a homeowner’s thinking on placement or design.

One courtesy worth extending: if the builder still has active crews on site, ask for the builder’s permission before arranging for your deck contractor to visit.

As for when installation can actually begin: not until you have your certificate of occupancy (CO). The CO is issued after the final municipal inspection of the home, typically around or after closing. Without it, a deck contractor can’t apply for the zoning approval or building permit needed to start work. The best move is to engage your deck contractor during the construction phase so the design and quote are ready to go the moment the CO is in hand.

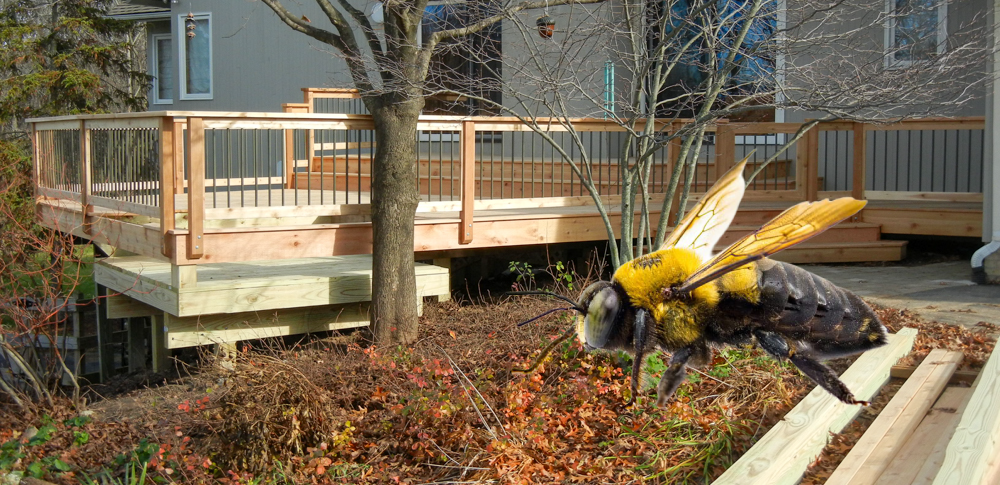
Footings and New Construction Soil

New construction sites involve significant soil disturbance. Excavation disrupts natural compaction, and disturbed soil needs time to settle, which carries real implications for deck footings. Footings set in disturbed soil, or that don’t reach undisturbed native soil below, risk settling unevenly over time. A reputable deck builder working on new construction will account for this, either through ledger attachment (which reduces reliance on soil for structural support) or through footings properly sized and placed to extend below the disturbed zone.

It’s also worth coordinating with your landscaper early. The final grade of your yard may change significantly between when the deck is built and when landscaping is complete. Footings that work in the current grade can create problems if significant regrading happens around them later. We’re happy to connect you with landscapers and stonemasons we work with regularly if you’re planning a complete outdoor space.

HOA Approvals in New Subdivisions

Most new subdivisions are governed by an HOA, and virtually all HOAs require approval before a deck is added. What makes new subdivisions slightly unusual is the Declarant Control Period: when a subdivision is new enough that the developer hasn’t yet turned control over to homeowners, the builder effectively runs the HOA. If you’re one of the first households in the development, deck approvals are handled through the builder rather than a formal HOA board. Timelines and processes can be less predictable during this period. Ask your builder’s team directly so you’re not left waiting without knowing why.

Builder’s Warranty vs. HOA Approval

These are two entirely separate things, and conflating them is a costly mistake. The HOA evaluates aesthetics, setbacks, and community standards. Your builder’s warranty is a separate document with its own conditions; it doesn’t care what the HOA approved. Read your builder’s warranty carefully before any work is attached to the house, specifically the sections relating to alterations and additions. A properly flashed and detailed ledger attachment isn’t just better waterproofing; it’s also how you avoid a warranty dispute later.

Beyond the builder’s warranty, the deck itself should carry its own protection. Ann Arbor Decks backs every project with our 10-year workmanship warranty regardless of materials. As a TrexPro Platinum certified installer, we also offer Trex’s extended labor warranty (up to ten years when both Trex decking and railing are installed), which is only available through certified contractors.

Think About the Long Game

New construction is a moment when it’s easy to focus on immediate cost and easy to underweight the long-term math. A pressure-treated wood deck costs less today. It also requires staining every two to three years, is susceptible to the cracking and graying that comes with Michigan winters, and has a shorter replacement cycle. A composite deck costs more upfront, requires almost no maintenance, carries a longer warranty, and typically costs less in aggregate over fifteen or twenty years when you account for maintenance and eventual replacement. We think it’s worth running those numbers before defaulting to the cheapest build.

Design longevity matters too. A blank-canvas backyard won’t stay that way, and the deck you build at move-in should accommodate your life in five or ten years, not just today. A few questions worth sitting with before you finalize:

  • What will your backyard eventually look like? Think about where a future patio, play area, or landscaping feature might go, and whether your deck’s footprint will work with that layout or fight against it.
  • Is your family growing, or are you thinking about aging in place? Safety, handrail placement, gate locations, and traffic flow are much easier to address in the design than to retrofit later.
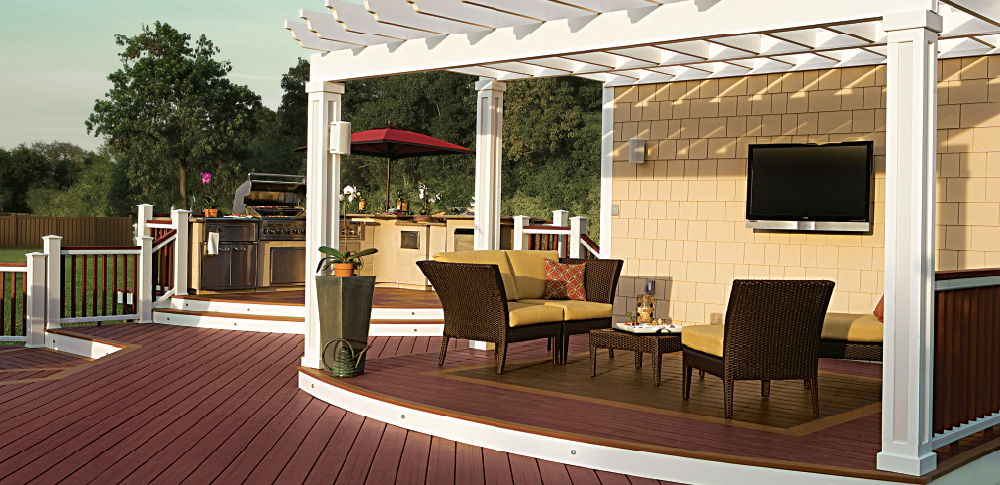
  • What infrastructure do you want roughed in? A gas line stub-out for an outdoor kitchen, electrical circuits for lighting or a future hot tub, or structural allowance for a pergola: all of these are inexpensive to incorporate during construction and disruptive to add afterward. Now is the time to plan for them.

Frequently Asked Questions

Can I get a quote before the house is finished? Yes. Once Tyvek is up, we can begin the conversation and work toward a preliminary design and estimate. We’ll revisit and confirm the details once the exterior is complete.

Can the deck be built before I move in? Possibly, but not until after you’ve closed and received your certificate of occupancy. If you move quickly on the permit application after closing, there’s sometimes a window to get the deck underway or even completed before you’re fully settled in.

Do I need to tell my builder I’m adding a deck? You should at minimum review your builder’s warranty and understand any requirements around third-party work attached to the house. If the builder’s crews are still active on the lot, a courtesy heads-up before your deck contractor visits is always a good idea.

What if my HOA hasn’t been formally established yet? In subdivisions still in the Declarant Control Period, the builder functions as the HOA. Contact the builder’s team directly to understand the approval process and what documentation they require.

How do I make sure my deck doesn’t void my home warranty? Read your builder’s warranty document carefully, specifically the sections on alterations and additions. Ask your deck contractor how they handle ledger attachment and waterproofing to protect the existing structure. When in doubt, ask the builder directly before work begins.

Plan Early, Build Right

A deck built with your five-year life in mind, on a new construction home with a blank-canvas backyard, is one of the better investments you can make in that property. The planning conversation is worth having before the build, not after.

Book your free estimate today. We serve Ann Arbor, Saline, Dexter, Chelsea, Pittsfield Township, Ypsilanti, and the surrounding Washtenaw County area.

Read more

Miss Dig

What on Earth Is MISS DIG 811, and What Are These Flags Doing in My Lawn?

Highlights from this Article:

  • MISS DIG 811 is Michigan’s free, legally required utility notification system. Before any digging can begin on your property, underground public utility lines must be located and marked.
  • When you hire Ann Arbor Decks, we handle the MISS DIG process for you. You don’t need to do anything.
  • The colored flags mark public utility lines: gas, electric, water, sewer, cable, and more. Each color has a specific meaning.
  • MISS DIG does not mark private utility lines, including underground sprinkler systems. If your sprinkler lines run through the deck area, your landscape company needs to move them before we dig.
  • Michigan law requires the MISS DIG process before any excavation, regardless of depth or project size.

Skip down to the flag color guide or the FAQs.

It’s a fairly common scene. A homeowner signs a contract for a new deck, and a few days before the job starts, walks out to find a dozen little colored flags sprinkled across their backyard. Sometimes there’s paint on the grass too. Nobody called ahead to explain any of it.

If that’s happened to you, don’t worry. It’s actually a sign that things are going exactly as they should. Those flags are the result of the MISS DIG 811 process, something we handle on every single deck project we build. This post explains what MISS DIG is, why it exists, what the flags mean, and one important thing it does not cover that homeowners sometimes learn about the hard way.

What Is MISS DIG 811?

MISS DIG 811 is Michigan’s nonprofit utility safety notification system. Its entire purpose is to prevent contractors and homeowners from accidentally digging into buried utility lines (gas mains, electric cables, water lines, sewer lines, communication cables) during construction or excavation work.

Here’s how it works. Before any digging begins, a locate request (called a “ticket”) is submitted to MISS DIG 811, either by calling 811 or submitting online at missdig811.org. MISS DIG then contacts all of its member utility companies, which send locators out to the property to mark the approximate locations of their underground lines. Those locators use small colored flags and spray paint to indicate where their lines are buried. After a minimum of three business days, once all responses are in, work can begin.

This is not optional. Michigan law requires that a MISS DIG locate request be placed before any excavation, regardless of how shallow or how small the project. Installing a fence post, planting a tree, building a deck: all of it requires MISS DIG clearance first. Skipping this step can result in fines, serious safety hazards, and liability for damage to utility lines.

The service itself is free to use.

Who Contacts MISS DIG?

When you hire a contractor for excavation work, the contractor (not the homeowner) is responsible for contacting MISS DIG. At Ann Arbor Decks, we handle this as a standard part of every project before a shovel hits the ground. You don’t need to call anyone or submit any requests. When you see flags in your yard, it means we’ve already taken care of it.

What Do the Different Colored Flags Mean?

The flags and paint follow the APWA Uniform Color Code, a standardized national system used by all 811 programs across the United States. Each color represents a different type of underground utility. Here’s what you’re looking at in your yard:

Flag Color What It Marks
Red Electric power lines and cables
Yellow Natural gas, oil, steam, or other flammable materials
Orange Communications lines: telephone, cable TV, fiber optic, internet
Blue Potable (drinking) water lines
Green Sewer and drain lines
Purple Reclaimed water or irrigation lines (municipal)
White Proposed excavation area: marks where digging will take place
Pink Temporary survey markings

When a utility company finds no lines in the area, they may respond with a “no conflict” status rather than placing flags. That’s also a normal and expected outcome for some utilities depending on your property.

The Important Thing MISS DIG Does NOT Cover

MISS DIG only locates and marks public utility lines (the ones owned and maintained by utility companies). It does not mark private utility lines, which are lines installed on your property that aren’t owned by a utility company.

The most common private lines we encounter on deck projects are underground sprinkler systems. If your property has an irrigation system, those lines will not be flagged by MISS DIG. They are your lines, not the utility company’s, and their locations are not in any system we can query.

This matters because deck footings require us to dig 42 inches deep for frost protection in Michigan. A sprinkler line running through the deck footprint area will be in the way. If we don’t know where it is, it’s at risk of being cut during excavation, which is both an inconvenience and a repair cost that nobody wants. While we can perform minor repairs on sprinkler lines, it’s much easier in the short and the long term to have your landscaper move them in advance.

If you have an underground sprinkler system, please let us know early in the project planning process. We’ll identify whether any sprinkler lines appear to run through the deck footprint area. If they do, we ask that you contact your landscape or irrigation company to have those lines located and, if necessary, relocated before we break ground. This is not something we can do for you; irrigation contractors have the specialized knowledge and equipment to reroute those lines safely.

Other private lines that MISS DIG won’t mark include invisible dog fence wiring, power lines to detached garages or outbuildings, lines to outdoor lighting or outdoor outlets, and power or gas lines to outdoor grills. If any of these run through or near your deck area, flag them for us before we start.

What Happens After the Flags Go In

Once the locate request is submitted and the three-business-day waiting period has passed, we check the “Positive Response” system online to confirm that all utilities have reported either a marked location or a no-conflict status. Only once all responses are clear can digging legally begin.

When digging takes place near a marked utility line, Michigan law requires hand digging within four feet on either side of any flag or paint marking. We take this seriously, not just because it’s the law, but because striking a gas or electric line can be dangerous. Deck footings near utility markings are excavated by hand, carefully.

A MISS DIG ticket is valid for 21 days from the legal start date. If work extends beyond that period, a new ticket is required. We manage this as part of the project timeline.

One More Thing: Please Don’t Pull, Move or Mow Over the Flags

We know they’re not the prettiest addition to a manicured lawn. But the flags need to stay in place until the excavation work at each footing location is complete. Removing or moving them before that point means the utility markings are gone, and we lose the reference points we need to know where not to dig.

The MISS DIG website points out that flags are attractive to young children. If you have kids, it’s worth explaining that the little flags in the yard are there for a reason and need to stay put. If you have pets, watch them in the yard.

When mowing the lawn, mow closely around (but not over) the flags. If your landscape company does your mowing, let them know about the flags and ask them to steer clear.

Once the footings are poured and the digging work is done, the flags can be removed. We’ll let you know when you’re clear.

Frequently Asked Questions

Why are there flags in my yard when I didn’t ask for them? Your contractor (us) submitted the MISS DIG locate request on your behalf as part of the permit and construction process. The flags were placed by the individual utility companies’ locators in response to that request. This is normal and means the process is working correctly.

How long will the flags be there? The flags will stay through the excavation portion of the project, typically through the footing dig and concrete pour. Once the relevant digging is complete, they can be removed. A MISS DIG ticket is valid for 21 days; if the project runs longer, we’ll handle renewing the locate request.

Is it okay if the flags get knocked over or a child pulls one out? If flags are disturbed, moved, or removed before excavation is complete, the marking information is compromised. Contact us right away and we will arrange a re-mark with MISS DIG. Do not assume you remember where a flag was and do not attempt to replace it yourself.

Will MISS DIG locate my sprinkler system? No. Underground sprinkler systems are considered private utility lines and are not located or marked by MISS DIG 811. If your irrigation system runs through the deck area, your landscape or irrigation contractor needs to locate and potentially relocate those lines before digging begins.

Do I need to do anything for the MISS DIG process? When you’re working with Ann Arbor Decks, no. We handle the entire process. The one thing we’d ask is that you let us know early if you have underground sprinkler lines, invisible dog fence wiring, or any other private lines on the property, so we can factor those into the project plan.

What happens if a utility line gets hit during excavation? If there is any hazardous situation (a gas line breach in particular), the first call is to 911. Then contact the utility company directly. This is precisely why the MISS DIG process exists, and why we take it seriously on every project. In nearly two decades of building decks in Washtenaw County, proper MISS DIG compliance means this scenario essentially never happens.

Part of Every Project We Build

The MISS DIG process is one of those behind-the-scenes steps that most homeowners don’t think about until the flags show up in the yard. We handle it as a standard part of every deck build, along with the permit applications, drawings, inspections, and everything else that goes into building a deck the right way in Washtenaw County.

If you have questions about the process for your specific project, we’re glad to walk through it with you.

Book your free estimate today. We serve Ann Arbor, Saline, Dexter, Chelsea, Pittsfield Township, Ypsilanti, and the surrounding Washtenaw County area.

Read more

Under-Deck Drainage

Under-Deck Drainage: Doubling Your Outdoor Living Space on an Elevated Deck

Highlights from this Article:

  • An under-deck drainage system collects rainwater as it drains between deck boards and channels it away, keeping the area below the deck completely dry.
  • Ann Arbor Decks installs both Trex RainEscape and TimberTech DrySpace, two systems with meaningfully different installation approaches.
  • Trex RainEscape installs over the joists before decking goes down; it cannot be added to an existing deck without removing the boards. TimberTech DrySpace installs under the joists and can be retrofitted to most existing elevated decks.
  • Both systems protect the framing from moisture, extending the life of the deck’s structural components.
  • Once the drainage system is in place, the space below can be finished with a vinyl beaded ceiling, lighting, ceiling fans, or left open with the drainage system visible.

Skip down to the system comparison table or the FAQs.

Most homeowners don’t think much about what happens under their elevated deck when it rains. Water passes through the gaps between deck boards, drips onto the joists and framing, saturates the space below, and generally makes the area unusable during and after any precipitation. On a second-story deck over a walkout basement, that means a lower patio that’s wet and muddy whenever the weather turns. On a higher first-floor deck, it means a storage or entertaining area that gets rained on just as much as the surface above.

An under-deck drainage system changes that equation completely. Instead of letting water fall through onto everything below, the system catches it at the framing level and channels it away through a network of troughs, panels, and downspouts, leaving the space below clean, dry, and genuinely usable in almost any weather.

Why You’d Want Under-Deck Drainage

The most obvious reason is usability. A dry under-deck space is a legitimate outdoor room. Depending on the height clearance below your deck, it can accommodate outdoor furniture, a dining or lounge area, a grill station, an outdoor kitchen, a hot tub surround, or simply a protected storage area that stays dry year-round. In Michigan, where spring and fall weather can be unpredictable, having a rain-protected outdoor space extends the season meaningfully.

There’s also a structural benefit that often goes unmentioned. An over-the-joist drainage system (like Trex RainEscape) creates a barrier above the framing that keeps moisture off the joists and beams entirely. Pressure-treated lumber, even quality material, has a finite lifespan when it’s repeatedly wetted and dried over years of Michigan weather. A system that keeps the framing dry from the start can significantly extend the structural life of the deck. For a composite deck surface that carries a 25- to 50-year warranty, protecting the wood substructure that supports it is a worthwhile investment.

The Two Systems We Install

Trex RainEscape

Trex RainEscape is an over-the-joist system. Before the deck boards go down, a network of flexible HDPE troughs is laid across the top of each joist bay (the space between joists), and downspouts are positioned to carry water from the troughs down and away from the structure. Butyl tape seals all seams and surrounds fasteners to prevent any water from reaching the framing below. Once the drainage system is in place and tested, the deck boards are installed on top of it.

Because RainEscape sits above the joists, it creates a true moisture barrier for the entire substructure. The joists and framing never see rain at all. The system is available in brown or black to coordinate with the decking above, and Trex offers plug-and-play LED soffit lights that install directly into the RainEscape ceiling from below, making the lighting integration clean and straightforward.

The significant constraint of RainEscape is that it must be installed during the build, before decking goes down. It cannot be added to an existing deck without removing all of the deck boards first. For new deck construction, it’s an excellent system. For an existing elevated deck, it requires either a full resurfacing project (which gives us access to the joists) or a different approach altogether.

TimberTech DrySpace

TimberTech DrySpace takes the opposite approach. Instead of sitting above the joists, DrySpace installs beneath them, attaching to the underside of the deck framing from below. The system uses interlocking V-shaped vinyl panels that snap into brackets secured to the joists, creating a sloped drainage surface that channels water away from the house. The pitch of the system (1/8 inch per foot) ensures consistent drainage toward the gutter or downspout at the perimeter.

The key advantage of DrySpace is that it can be installed on most existing elevated decks without removing a single deck board. As long as there is access from below (which is nearly always the case on an elevated deck), DrySpace can be retrofitted to the existing framing. This makes it the right choice for homeowners who already have an elevated deck in good structural condition and want to add drainage and a finished ceiling without undertaking a full resurfacing project.

DrySpace is made of solid extruded vinyl, is available in Bone and White, and comes with a 25-year limited warranty. The system works with 12-inch and 16-inch on-center joist spacing. It is designed to work with an external gutter at the perimeter to carry water away from the structure.

Can You Add Drainage to an Existing Deck Without Removing the Boards?

Yes, but only with the right system. This is one of the most common questions we get on this topic, and the answer depends entirely on which system you’re considering.

Trex RainEscape requires access to the tops of the joists, which means the deck boards have to come off. If your existing deck is due for a resurfacing anyway (the boards are worn, the surface is tired, or you’re ready for composite), a resurfacing project combined with RainEscape installation is a natural pairing. We access the joists during the resurfacing, install RainEscape before the new boards go down, and you end up with both a new deck surface and a fully functioning drainage system in one project.

TimberTech DrySpace, by contrast, is specifically designed for both new and existing decks. It installs entirely from below. If your deck structure is sound and you’re happy with the surface, DrySpace can be added without disturbing a single board above. We assess the framing from below, confirm the joist spacing and structural condition, and install the system from the underside. This is the practical path for most existing decks where a full resurfacing isn’t otherwise warranted.

Trex RainEscape vs. TimberTech DrySpace at a Glance

Trex RainEscapeTimberTech DrySpace
Installation positionOver the joists (above framing)Under the joists (below framing)
New deck installationYesYes
Existing deck retrofitOnly if deck boards are removedYes, without removing deck boards
Protects framing from moistureYes (complete barrier above joists)Partial (water still contacts joists before draining)
MaterialHDPE trough and downspout system with butyl tape sealingSolid extruded vinyl V-panels with bracket system
ColorsBrown or BlackBone or White
Integrated lighting optionYes (Trex plug-and-play soffit lights)Via finished ceiling added below
Warranty25 years25 years

Finishing the Space Below

Once the drainage system is in place, you have choices about how to finish the underside of the deck. The right approach depends on how you intend to use the space, how much you want to invest in finishing, and personal preference.

Leave the Drainage System Exposed

Both RainEscape and DrySpace are reasonably clean-looking systems. RainEscape’s brown or black troughs, viewed from below, give the ceiling a structured, industrial-adjacent look that some homeowners find appealing as-is. DrySpace’s white or bone vinyl panels create a clean, light-colored surface that reads almost like a simple ceiling without any additional finishing. For storage areas or utilitarian spaces, leaving the drainage system visible is a perfectly practical choice that keeps costs lower and installation simpler.

Vinyl Beaded Ceiling

For a more finished look (particularly in spaces intended for outdoor dining, lounging, or entertaining), a vinyl beaded ceiling installed below the drainage system is the most popular upgrade. Beaded vinyl ceiling panels give the under-deck space the feel of a covered porch, with a clean, consistent surface that hides the framing and drainage components completely. The combination of a drainage system above and a finished ceiling below creates what is effectively an outdoor room. Vinyl is the right material for this application because it won’t warp, rot, or absorb moisture the way wood would in an outdoor environment.

Lighting

A drainage system creates the infrastructure for safe under-deck lighting, since the ceiling area is dry and protected from above. Trex offers plug-and-play LED soffit lights that integrate directly with the RainEscape system; they install into the trough ceiling from below using spring clips and connect to Trex’s standard low-voltage system. For DrySpace installations, or where a vinyl beaded ceiling is added, recessed or surface-mounted outdoor-rated fixtures can be installed in the finished ceiling. Lighting transforms an under-deck space from a daytime-only storage area into an evening entertaining space and is one of the most impactful upgrades available at a relatively modest cost.

Ceiling Fan

On an elevated deck with reasonable clearance below (typically eight feet or more), a ceiling fan rated for damp or wet outdoor use can be mounted to the deck framing or a finished ceiling below. In Michigan summers, a ceiling fan makes a significant difference in comfort, particularly in humid weather or in south- and west-facing spaces that collect afternoon heat. If a ceiling fan is part of your plan, electrical rough-in needs to be coordinated during the construction phase. This is one of those details that is straightforward to plan for during the build and much more disruptive to add after the fact.

Frequently Asked Questions

Does my deck need to be elevated to use an under-deck drainage system? Yes, in a practical sense. These systems create a dry space below the deck, so there needs to be a meaningful “below” (a patio, walkout basement level, or storage area) that benefits from being kept dry. Ground-level decks don’t have this space and don’t need drainage systems for the same reasons. Elevated decks, second-story decks over walkout basements, and decks with significant clearance below are the right candidates.

How high does my deck need to be for an under-deck system to make sense? There’s no strict minimum, but practically speaking, a deck needs enough clearance for the space below to be useful. Five feet of clearance provides storage utility; seven or more feet opens up genuine living space with room for furniture, a fan, and lighting. We’ll assess the clearance during our consultation and help you determine whether a drainage system makes sense for your specific deck.

Will a drainage system change the look of my deck from above? Not with either system. RainEscape sits between and over the joists, invisible once decking is installed. DrySpace is installed entirely from below and has no effect on the deck surface whatsoever.

How does water exit the system? Both systems direct water to a gutter or downspout at the perimeter of the deck, which carries it away from the structure. RainEscape uses integrated downspouts built into the trough system; DrySpace directs water to a gutter attached at the perimeter. In both cases, the water exits in a controlled location rather than dripping randomly across the area below.

Can I add a ceiling fan to the under-deck space? Yes, provided there’s adequate clearance and electrical access. The fan needs to be rated for outdoor damp or wet locations, and the electrical wiring needs to be properly installed. We coordinate this through our electrician for projects where a fan is part of the plan. If you think you might want a fan at some point, it’s worth discussing during the design phase so wiring can be roughed in ahead of time.

Does under-deck drainage require a permit? Generally not for the drainage system itself, though finishing the space with electrical work (lighting, ceiling fan) does require an electrical permit. We handle permits for all work we perform on your project.

Planning Your Under-Deck Space

Whether you’re building a new elevated deck and want to incorporate drainage from the start, or you have an existing elevated deck and are ready to finally make use of the space below, we’d be glad to walk through the options with you on-site. We’ll look at your clearance, your joist spacing, your existing deck condition, and how you envision using the space, and give you a clear recommendation on which system makes the most sense.

Book your free consultation today. We serve Ann Arbor, Saline, Dexter, Chelsea, Pittsfield Township, Ypsilanti, and the surrounding Washtenaw County area.

Read more

Deck Lighting

Deck Lighting: A 2026 Guide

Highlights from this Article:

  • Deck lighting serves two core purposes: safety (illuminating stairs, edges, and transitions) and ambiance (extending the usability of your outdoor space into the evening).
  • There are various distinct light types for decks, each suited to different locations and effects. A well-designed lighting plan typically combines several of them.
  • Low-voltage transformer systems are the most reliable and flexible option for most decks. Solar and battery systems have a place but come with trade-offs.
  • Trex and TimberTech both offer deck and rail lights. Feeney DesignRail and Westbury Rail (Magena Star) each offer integrated lighting systems designed to coordinate with their railing products.
  • If you wish, the Ann Arbor Decks design team will offer a complete lighting package as part of your deck proposal. It’s a separate line item, fully customizable, so you know exactly what you’re getting and what it costs.

Skip down to the lighting system comparison or the FAQs.

Well-designed deck lighting is really important in Michigan. Let’s face it: the Mitten State can get dark early, and we need more lighting to extend our enjoyment of our decks. It’s also easy to underestimate how much the right lighting can make a deck safer while adding to the ambience. Deck lighting does very practical work: it marks stair edges, defines the perimeter of the deck, and helps guests move safely in unfamiliar spaces after dark. Safety and aesthetics aren’t competing goals in deck lighting; they’re usually achieved by the same fixtures.

This post covers the available light types, how the major system configurations work, the most popular brands we install, and what to think about as you approach the design conversation.

Types of Deck Lighting

Riser Lights

Riser lights mount into the vertical face of each stair tread and cast a downward wash of light across the step below. They’re one of the most functional lighting choices on any deck with stairs, making each tread visible after dark without creating glare. They’re also durable by design; these fixtures are built to handle foot traffic in close proximity and hold up through Michigan winters without issue. If your deck has stairs and you’re adding any lighting at all, riser lights are usually the starting point.

In-Deck Lights (Recessed Deck Lights)

In-deck lights are mounted flush with the surface of the deck boards themselves, producing a soft ambient glow at ground level. They’re commonly used to define the perimeter of a deck (especially when there’s no railing), line a pathway, or accent a specific area like a sunken hot tub or fire table surround. Because they sit low and cast light outward and upward, they add a warm, layered quality to a deck’s evening atmosphere. They can also be used in stair treads as an alternative or complement to riser lights.

Post Cap Lights and Post Side Lights

Post cap lights sit atop railing (newel) posts and cast a warm glow in all directions, illuminating the deck and surrounding yard at a comfortable height. They’re one of the most visually prominent lighting elements on a deck and are often the anchor of a lighting scheme. Post side lights (sometimes called accent lights) mount to the face or side of a post rather than the top, directing light downward along the post and onto the deck surface below. Both types are available to match most railing post profiles and powder-coat colors. Lighted rail posts or rail caps are often used to mark out the two posts at the top or bottom of a set of stairs.

Under-Rail Lights

Under-rail lights mount into the top or bottom rail of a railing system, running along its length and casting a soft downward light onto the deck. They’re a linear, clean, architectural lighting element, and they work particularly well on longer rail runs where you want a consistent, defined glow along the railing. Not all railing systems allow for this style of rail lights. Feeney DesignRail allows for top and bottom rail lighting with their horizontal cable rail systems, so that’s a popular choice for many homeowners. It’s even possible to integrate lighting into natural wood top rails (like Ipe or cedar).

Custom Options: Task Lighting, Safety Floodlights, and Sconce Lighting

Beyond the standard deck lighting menu, there are custom options worth discussing for the right project. Task lighting (directional fixtures focused on a grill station, outdoor kitchen, or work surface) makes a covered cooking area genuinely functional after dark rather than just atmospheric. Safety floodlights on the house wall or an overhead structure can illuminate a larger area for security or practical use. Sconce lighting mounted to a privacy wall, pergola post, or house exterior adds an architectural quality that standard deck lights don’t provide. These options work best when they’re planned into the design from the start, not added afterward.

Ceiling Fans with Lights (Covered Decks and Porches)

If your deck is covered (a solid-roof pergola, a screened porch, or a roof-covered deck), a ceiling fan with an integrated light is one of the most practical investments you can make. In Michigan summers, the fan extends comfortable outdoor time by several degrees, and the overhead light provides broad, even illumination that railing-level fixtures can’t replicate. For covered outdoor spaces, this is the one lighting fixture we’d consider close to essential.

Lighting System Configurations

Low-Voltage Transformer Systems

The large majority of deck lighting we install runs on low-voltage (12V DC) transformer systems. A transformer plugs into a standard outdoor outlet and steps the household current down to a safe, low-voltage level that powers all the deck lights through a network of run wires. The benefits of this approach are significant: consistent, reliable light output regardless of weather or season, the ability to run multiple light types on one system, dimming capability, and timer or smart control integration. Installation requires some planning (wire runs need to be routed during the build for the cleanest result) but the performance over the life of the deck is hard to match.

Both Trex and TimberTech require their own branded transformers for warranty compliance, and their systems are designed as integrated ecosystems. Westbury’s Magena Star lighting system similarly uses a dedicated transformer and wiring system matched to their railing products. These transformers often feature dusk/dawn timers, remote controls, and other handy options.

The main limitation of a low-voltage system is that it requires an accessible outdoor outlet. If your deck doesn’t have one nearby, that’s no problem. We can factor adding one into the project scope and budget.

Solar Lights

Solar post cap lights and solar riser lights are a legitimate option for homeowners who want a simple, low-commitment lighting addition without running any wire. They charge during the day and activate automatically at dusk. Trex offers a solar option that’s popular for customers who require just a few post cap lights in a location that gets good daytime sun exposure.

The honest trade-offs: solar lights are dependent on sun exposure and perform noticeably less well on overcast days or in shaded yards, both of which are common in Washtenaw County. Light output is generally dimmer than low-voltage systems, and performance degrades as the battery ages over several years. For a primary lighting scheme, we’d steer most homeowners toward a transformer system. For a secondary accent or a location where running wire is genuinely impractical, solar is a reasonable choice.

Battery-Powered Systems

Battery-powered lights offer flexibility in placement (no wire runs, no outlet required) and are useful for accent locations or temporary setups. The limitations are similar to solar: output is lower than transformer systems, and the ongoing cost and inconvenience of battery replacement adds up over time. For permanent deck lighting, batteries are best treated as a supplement to a transformer system rather than the primary approach.

Lighting System Comparison

Low-Voltage TransformerSolarBattery
Light outputConsistent, dimmableVariable (weather-dependent)Moderate, declines as battery drains
InstallationRequires wire runs and outletNo wiring neededNo wiring needed
Ongoing costLow (minimal electricity)Low (battery replacement over time)Ongoing battery cost
Best forPrimary lighting schemeAccent or low-priority locationsSupplemental or temporary
Performance in cloudy weatherUnaffectedReducedUnaffected until battery drains
Smart controls / dimmingYes (with compatible transformer)LimitedLimited

Brands We Install

Trex Outdoor Lighting

Trex’s lighting line covers a wide range of deck light types: riser lights, recessed in-deck lights, rail post accent lights, and post cap lights (including a solar cap option). All Trex lighting uses long-life Cree LEDs and runs on a 12V DC transformer system. A standout feature is the Trex LightHub plug-and-play connection system, which allows lights to be connected without splicing wires, making installation cleaner and more DIY-accessible than most systems. Trex lighting is designed to integrate visually with their composite decking and railing lines and is available in Charcoal Black, Classic White, and Bronze. If you’re building with Trex decking and railing, their lighting system is a natural fit for a cohesive finished look.

TimberTech Lighting

TimberTech’s lighting system, marketed under the DeckLites name, includes post cap light modules, in-deck lights, riser lights, under-rail lights, and accent lights. The system runs on 12V low-voltage and includes dimmable, Instant On fixtures with a 5-year limited warranty. A notable feature is the under-rail light, which produces a clean, hidden downlight effect between balusters that works particularly well with TimberTech’s Impression Rail systems. TimberTech’s lighting requires their branded transformer or PowerPack for warranty compliance. The product line is available in Matte White, Matte Black, Matte Espresso, and Architectural Bronze, coordinating well with their railing color palette.

Westbury (Magena Star) Lighting

Westbury’s lighting offering is the Magena Star line, produced by Digger Specialties and designed specifically to match Westbury aluminum railing in both form and finish. Magena Star includes low-voltage post cap lights, post side lights, and riser lights, all powder-coated to coordinate with Westbury’s railing colors and textures. The system uses a dedicated transformer and easy-plug wiring, and is available in both low-voltage and solar configurations. Because Westbury railing posts use a consistent 3-inch exterior profile, lighting components fit cleanly without adaptation. If your project includes Westbury aluminum railing, Magena Star is the logical lighting companion.

Feeney DesignRail Lighting

Feeney DesignRail–a customer favorite for its horizontal cable rail–offers modern, clean-lined under rail lighting strips that call out the deck’s perimeter with a subtle glow. Their 24V “Wet location” strip light has a weatherproof housing, and it features dimming capability. Feeney also offers side post lights (“accent lights”) that are wet rated and feature a beautiful, glowing 108 lumen output. The Feeney lighting options can be matched exactly to the railing finish options, including their custom colors.

What to Think About When Designing Your Lighting

A few considerations that help guide the design conversation:

Start with safety, then add ambiance. Steps and deck edges (especially for decks that have no railing) are the non-negotiable starting points. Riser lights on every stair run and some form of perimeter or post lighting to define the deck edge should be the baseline. From there, in-deck lights, under-rail lighting, and accent fixtures add atmosphere.

Think about how you use the deck. A deck used primarily for quiet evening dining has different lighting needs than one used for gatherings of twenty people. A cooking area benefits from task lighting. A hot tub surround benefits from perimeter in-deck lights. Knowing how you actually live in the space shapes the lighting design more than any other factor.

Plan the wiring during the build. Lighting added to an already existing deck almost always involves some compromise in wire routing. When lighting is planned from the start, wire runs can be hidden within the framing and posts for a completely clean result. In addition, an outdoor plug can be placed in the most useful location. If you’re building a new deck or resurfacing an existing one, the time to think about lighting is before the new deck boards go down (or the railing goes up).

Consider your yard’s sun exposure for solar. Shaded yards and overcast Michigan winters make solar a less dependable primary lighting system than in sunnier climates. This is worth factoring in early rather than discovering after installation. In Michigan, it’s a good idea to opt for wired lighting whenever possible.

Match your lighting to your decking and railing system. Each of the brands we install has a lighting line designed to coordinate with its own railing in both color and profile, so keeping the deck lighting within the same brand ecosystem as your railing is the way to go. If your deck doesn’t need any railing, we usually–but not always–propose a lighting system that’s of the same brand as your decking. If we’re installing a wood deck or wood railing, we may suggest one of a number of lighting systems to you.

How Ann Arbor Decks Approaches Lighting Design

Deck lighting is something we think about as part of the overall design, not as an afterthought. When we put together your proposal, a lighting package is included as a separate line item. That means you can see clearly how many lights we’re recommending, what types, and what the cost is, and you can adjust that package as you see fit. Want to add riser lights but skip the in-deck perimeter? We can do that. Want to upgrade to a full integrated system with dimming controls? We can do that too. The goal is a lighting plan that fits your deck, your yard, and your budget, built from the ground up to work with the materials you’ve chosen.

If you’re designing a new deck or wondering whether lighting makes sense for an existing one, we’re glad to walk through the options with you on-site.

Book your free consultation today. We serve Ann Arbor, Saline, Dexter, Chelsea, Pittsfield Township, Ypsilanti, and the surrounding Washtenaw County area.

Frequently Asked Questions

Does deck lighting require an electrician? Low-voltage transformer systems operate at 12V DC, which is well below the threshold requiring licensed electrical work for the lighting components themselves. The transformer plugs into a standard outdoor outlet. If you don’t have an outdoor outlet where you need one, adding one does require a licensed electrician and should be budgeted separately. We can help coordinate this if needed.

How many lights does a typical deck need? It depends heavily on deck size, configuration, and the type of lighting you want. A modest 300-square-foot deck with one stair run might have four riser lights, four to six post cap lights, and a handful of in-deck perimeter lights. A larger or more complex deck could have significantly more. The lighting package in your proposal will specify exactly what we’re recommending and why.

Can lighting be added to an existing deck? Yes, in most cases. The main consideration is wire routing. On an existing deck, wires may need to be surface-mounted in channels or run through existing post cavities rather than hidden within framing. The result is functional but sometimes less clean than lighting planned during a new build. We’ll tell you honestly what’s achievable on your specific deck during a consultation.

Do deck lights hold up in Michigan winters? Quality low-voltage LED fixtures are rated for outdoor use year-round and handle Michigan freeze-thaw cycles without issue. Trex and TimberTech lights use Cree LEDs in weather-resistant housings built for exactly these conditions. Solar lights in northern climates may underperform in winter months due to reduced daylight and sun angle, which is worth factoring into any solar decision.

What’s the difference between warm white and cool white LED lights? Warm white (around 2700-3000K color temperature) produces a soft, amber-tinged glow similar to incandescent light. It’s the more popular choice for residential decks because it looks inviting and relaxed, rather than clinical. Cool white (4000K and above) is brighter and more neutral, sometimes used in task lighting or commercial settings. Trex and TimberTech both use 3000K LEDs in their primary lighting products, which sit at the warmer end of the spectrum.

Read more

Professional Deck Installation vs. DIY

Professional Deck Installation vs. DIY: A Comparison

Highlights from this Article:

  • DIY deck building is legal and achievable for skilled homeowners, but the full scope of what’s involved is often underestimated at the outset.
  • Permits, drawings, inspections, MISS DIG clearance, and code compliance are required regardless of who builds the deck. None of these go away for a homeowner project.
  • Demolition of an existing deck is a significant project in itself, and one that homeowners frequently underestimate in both labor and disposal cost.
  • Ann Arbor Decks is a TrexPro Platinum certified installer, which provides access to Trex’s extended labor warranty (up to 10 years) and our own 10-year workmanship warranty.
  • The cost savings of DIY are real but smaller than most homeowners expect, because labor is only one component of the total cost.
  • Professional installation carries accountability that a DIY project doesn’t. A contractor’s work is inspected, warranted, and professionally liable in a way that self-built work is not.
  • For complex projects, multi-level decks, elevated decks, or anything involving structural engineering, professional installation is strongly recommended.

Skip down to the DIY vs. professional comparison or the FAQs.

This is a question worth taking seriously rather than dismissing. Homeowners who ask it are usually weighing something real: the cost of professional installation is significant, and for someone with genuine carpentry skills, a well-equipped shop, and the time to commit, building their own deck is a legitimate option. We’re not going to tell you otherwise.

What we will do is give you an honest picture of what’s actually involved: not the version that makes it sound easy, and not the version designed to scare you into hiring someone. After building decks in Washtenaw County since 2006, we have a clear view of where DIY projects go well, where they run into trouble, and what professional installation actually provides beyond showing up with tools.

What DIY Actually Involves

The visible part of building a deck (cutting boards, driving screws, framing) is the part most people picture when they think about doing it themselves. It’s real work, but it’s the part a skilled woodworker or experienced DIYer can handle. What often gets underestimated is everything that surrounds that work.

Permits and drawings. In most Washtenaw County municipalities, a deck permit requires detailed construction drawings showing footing size and depth, framing dimensions and spacing, ledger attachment details, railing specifications, and stair design. These drawings need to be accurate enough to pass plan review. Preparing them takes time and specific knowledge of local code requirements. If the drawings are incomplete or incorrect, the permit application comes back for revision, adding weeks to the project timeline.

MISS DIG clearance. Before any footing excavation can begin, a MISS DIG 811 locate request must be submitted and cleared. This is a legal requirement, not optional. The three-business-day waiting period is built into the schedule regardless of who is doing the work.

Inspections. A permitted deck requires a footing inspection before concrete is poured, potentially a framing inspection before decking goes down, and a final inspection before the deck is occupied. Each of these requires scheduling with the building department, being present or accessible, and passing before work can proceed. If an inspection fails, the work stops until corrections are made and a re-inspection is scheduled.

Material procurement and logistics. Ordering the right quantities of composite decking, hardware, concrete, and framing lumber (and having it delivered in the right sequence) takes planning. Over-ordering wastes money. Under-ordering stalls the project while you wait for additional materials. Specialty items like composite railing components, hidden fastener systems, and post hardware have lead times that need to be accounted for. When delivery errors occur (wrong color, wrong length, missing components), we handle the resolution with the supplier directly as part of the project. A homeowner managing their own materials order is on their own when that happens.

Demolition of an existing deck. If you’re replacing an existing deck, demo is its own project before the real project begins. Homeowners consistently underestimate both the labor and the cost involved. Demolishing even a modest deck means disconnecting it from the ledger, pulling fasteners and hardware, breaking apart composite or wood board by board, cutting up and hauling away framing lumber, disposing of concrete footings if they’re being replaced, and renting a dumpster or making multiple dump runs. On a larger or older deck, demo alone can take a full weekend and generate a surprising disposal bill. We include demolition as part of our project scope when it’s needed, so there’s no hidden second job before the build can start.

Tool requirements. A deck build requires more than a circular saw and a drill. Post hole diggers or a rented auger, concrete mixing equipment, a miter saw for angle cuts, levels, chalk lines, impact drivers, specialized jigs for hidden fasteners, post levels, framing squares, and board-spacing tools are all part of a complete tool kit. We own all of it, including the handy extras that make a job faster and more precise. For a DIYer, renting what you don’t own adds cost, scheduling complexity, and return trips when a rental period runs long.

None of this is impossible for a capable homeowner. It’s just more than most people account for when they start thinking about the project.

Where the Cost Comparison Actually Lands

The assumed logic of DIY is: materials cost X, a contractor charges X plus labor, so by doing it yourself you save the labor. This is roughly true but the savings are often smaller than expected, for a few reasons.

First, professional contractors buy materials at contractor pricing that homeowners typically can’t access. The difference varies by material and supplier, but it’s not unusual for a contractor’s material cost to be noticeably lower than retail pricing on the same products. Some of the labor savings get offset by paying retail for materials.

Second, the permit, drawings, and inspection management that a professional handles have real value and real cost in time. When we prepare drawings, submit permit applications, coordinate with the building department, and manage inspections, those hours are absorbed into the project. A DIY homeowner pays for those same hours with their own time.

Third, mistakes are more expensive when you’re doing it yourself. A professional who frames a ledger incorrectly fixes it as part of the job. A homeowner who frames a ledger incorrectly either catches it at inspection (which means redoing the work) or doesn’t catch it, which means a structural problem that may not surface for years. The cost of errors on a professional project is the contractor’s problem. The cost of errors on a DIY project is entirely yours.

This doesn’t mean DIY is a bad financial choice. For a homeowner who genuinely has the skills, the tools, the time, and the patience for the full process, the savings can be real and meaningful. The key is going in with accurate expectations about what those savings actually are, and what you’re taking on in exchange for them.

What Professional Installation Actually Provides

Beyond the labor itself, a professional deck installation from a licensed contractor comes with several things a DIY project doesn’t.

Speed and efficiency. This is what our crew does every day, across every combination of materials, configurations, and site conditions that Michigan throws at us. That repetition produces a pace that a homeowner working weekends simply can’t match. Our team works through rain, cold, and grey skies: essentially every weather Michigan offers short of a tornado. A DIY project that stretches across weekends and weather delays through an entire spring can turn a project that would take our crew days into one that takes a homeowner months, with the job site sitting open and the deck unusable in the meantime.

TrexPro Platinum certification and extended labor warranties. Ann Arbor Decks is a certified TrexPro Platinum installer, and the highest level of recognition Trex awards to contractors. TrexPro Platinum status requires demonstrated mastery of Trex products and installation techniques, a valid contractor’s license, and appropriate insurance. It’s not a designation that every deck builder holds.

One of the most tangible benefits of that certification is access to Trex’s extended labor warranty, which is only available when a deck is installed by a TrexPro Platinum contractor. If you have either Trex decking or Trex railing installed, the labor warranty runs five years. If you have both installed, that extends to ten years, covering the cost of removal, disposal, and reinstallation if a warranted material defect occurs. A DIY installation or an installation by a non-certified contractor does not qualify for this coverage.

In addition to the Trex labor warranty, Ann Arbor Decks backs every project we build with our own workmanship warranty. That covers the quality of our installation work regardless of the product: Trex, TimberTech, cedar, Ipe, or any other material we install. It applies to every project, full stop. Together, these warranties provide a level of protection that a self-built deck simply can’t replicate.

Accountability. A licensed contractor’s work is tied to their license. If the deck fails inspection, they fix it. If there’s a structural problem that emerges after the build, there’s a party to hold accountable and, in most cases, a warranty to invoke. A homeowner building their own deck is both the contractor and the client; there’s no one else in the chain when something goes wrong.

Code knowledge. Building codes for decks cover dozens of specific requirements: footing depth and sizing, ledger attachment methods and flashing, joist and beam span tables, railing height and baluster spacing, stair geometry, handrail graspability, hardware specifications. A professional who builds decks regularly knows these requirements in detail and applies them without having to look each one up. A first-time DIY builder is learning the code from scratch on a project where getting it wrong has structural and safety consequences.

Warranty. As noted above, composite decking warranties often have installation requirements. The Trex extended labor warranty (up to ten years for decking and railing combined) is only available through TrexPro Platinum installers. This is not a minor distinction: it means a homeowner who installs their own Trex deck is leaving a significant warranty benefit on the table.

Insurance. A licensed, insured contractor carries general liability insurance. If something goes wrong during construction (a footing collapses, equipment causes damage, an injury occurs on the job site), the contractor’s insurance covers it. A homeowner doing their own work has no such coverage for construction-phase incidents, and a homeowner’s insurance policy may not cover self-built work that isn’t permitted and inspected.

Design input. A professional deck builder brings a body of experience with what works and what doesn’t, in layout, material selection, structural detailing, and how decks hold up over time in Michigan’s climate specifically. That’s not something a YouTube tutorial provides.

DIY vs. Professional Installation at a Glance

DIYProfessional
Permit and drawingsHomeowner’s responsibilityContractor handles
MISS DIGHomeowner’s responsibilityContractor handles
InspectionsHomeowner coordinates and must passContractor coordinates and is responsible for passing
Material costRetail pricingContractor pricing (typically lower)
Labor costYour timeIncluded in contract price
Accountability for defectsHomeownerContractor (warranty)
Insurance during buildTypically not coveredContractor’s general liability
Code complianceHomeowner’s responsibility to learn and applyContractor’s expertise and license
Manufacturer warranty eligibilityMay be limitedFull warranty with certified installer

When Professional Installation Is Especially Recommended

For a straightforward ground-level or low deck with simple rectangular framing, a skilled and patient homeowner can produce a good result with proper research and preparation. But there are projects where professional installation is strongly advisable regardless of the homeowner’s skill level:

  • Elevated decks and second-story decks. The structural stakes are higher, the framing is more complex, and the consequences of errors are more serious. A deck that fails structurally at six feet off the ground is a different situation than one at grade.
  • Decks attached to the house (ledger-mounted). Ledger attachment is one of the most code-sensitive and failure-prone details in deck construction. Improper ledger connections are among the leading causes of deck collapses–and water intrusion issues. Getting this right requires understanding both the structural requirements and the waterproofing details that prevent rot at the connection over time.
  • Multi-level or complex-geometry decks. Angles, multiple levels, and irregular shapes multiply the planning and execution complexity significantly.
  • Projects requiring engineering. Some municipalities require engineer-stamped drawings for certain deck configurations. This is outside the scope of a typical DIY project.
  • Projects with integrated features. Outdoor kitchens, built-in lighting, under-deck drainage systems, pergolas, and similar elements each add layers of complexity that benefit from professional coordination.

Frequently Asked Questions

Is it legal to build my own deck in Michigan? Yes. Michigan law allows homeowners to build on their own property, and a homeowner can apply for a permit for work they will perform themselves. The requirements (drawings, inspections, code compliance) are the same as for a contractor. What is not legal in Michigan is using a contractor who then asks you to pull the permit in your name for work they perform. That arrangement protects the contractor at your expense, and is a serious red flag.

Will a DIY deck void my composite decking warranty? It depends on the manufacturer and product line. Some composite warranties are valid for any properly installed deck regardless of who installs it. Others, particularly at the premium tier, require installation by a certified professional for full warranty coverage. We recommend checking the specific warranty terms for any product you’re considering before you decide how to proceed.

What if I want to do some of the work myself and hire out the rest? Ann Arbor Decks does not take on partial projects. We occasionally get requests to install just the footings and ledger, with the homeowner planning to complete the framing and decking themselves. We understand the thinking, but our answer is no, and here’s why. When we pull a building permit, we are pulling it for the entire deck. That makes us legally responsible for the full scope of the project through final inspection. We’re not in a position to stake our license on work we didn’t perform. It’s also worth knowing that in Michigan, a licensed contractor cannot legally work under a homeowner permit, so the arrangement would need to be structured with care regardless. If you’re set on doing some portion of the work yourself, you’d need to find a contractor whose business model supports partial scopes, and you’d need to sort out the permit structure carefully with them.

How do I find a reliable deck contractor in the Ann Arbor area? Look for a contractor who is licensed with the state of Michigan, carries general liability and workers’ compensation insurance, and handles their own permits. Ask for references from recent local projects and check that they have experience with the specific materials and configurations you’re considering. A contractor who hesitates on any of these points deserves scrutiny.

The Bottom Line

DIY deck building is a real option for the right homeowner: someone with carpentry experience, adequate tools, time to manage the full process including permits and inspections, and comfort taking on the accountability for the result. For that person, the savings are genuine.

For most homeowners, the hidden complexity of the permit process, the learning curve on code requirements, the coordination of materials and inspections, and the risk profile of getting structural details wrong make professional installation a better investment than the initial cost difference suggests. A deck that’s permitted, inspected, structurally sound, and covered by a contractor’s warranty is a different asset than one that isn’t, particularly when it comes time to sell the home.

If you’d like an accurate picture of what professional installation would actually cost for your specific project, we’re glad to put one together.

Book your free estimate today. We serve Ann Arbor, Saline, Dexter, Chelsea, Pittsfield Township, Ypsilanti, and the surrounding Washtenaw County area.

Read more

Decking Heat Mitigation

Heat Mitigation in Composite Decking: What Is It, and Will It Make My Deck Less Hot?

Highlights from this Article:

  • All composite decking gets hot in direct sun. Heat mitigation technology reduces how hot, but does not eliminate the issue.
  • Color is the single biggest factor in how hot a deck board gets. Lighter colors stay significantly cooler than darker ones, regardless of the product line.
  • Heat mitigation matters most when you want a darker color and your deck sits in full or near-full sun.
  • Trex’s SunComfortable technology is now available across the Transcend Lineage, Select, and Enhance lines. TimberTech’s Advanced PVC offers comparable performance across its Vintage, Landmark, and Harvest collections.
  • Shade structures are a complementary strategy worth considering alongside material and color selection.

Skip down to the product line comparison or the FAQs.

Worried about your toddler’s toes, or your pet’s paws? Wondering whether heat mitigation in composite decking will eliminate the problem of a hot deck entirely? We want to clear this up, because it’s a feature that’s genuinely useful in the right circumstances and genuinely oversold in others.

Ann Arbor Decks is a certified TrexPro Platinum contractor, and our team has gone through Trex University, the company’s training program for professional installers. Heat mitigation came up as a significant topic, and what we took away from that training lines up with what we see in the field: the technology is real and it works, but color is still the dominant variable in how hot your deck gets.

The Basic Physics

Dark surfaces absorb more solar energy than light ones. This applies to everything from car roofs to T-shirts to deck boards. A dark composite board sitting in full afternoon sun is going to get hotter than a light one from the same product line, regardless of what heat mitigation technology is built into the shell. That’s not a flaw in the technology; it’s physics, and no composite manufacturer has figured out how to fully engineer around it.

What heat mitigation technology does is reduce heat absorption within a given color range by engineering the board’s shell to reflect more solar energy rather than absorbing it. Trex calls their version SunComfortable technology. TimberTech Advanced PVC boards achieve a similar result through their capped polymer construction. Both approaches make a meaningful difference when comparing boards of similar colors, but they don’t close the gap between a light board and a dark board of the same product.

The practical upshot, which Trex’s own training materials make clear: if you want a cooler deck, choose a lighter color first. Heat mitigation technology is an additional benefit on top of that choice, not a substitute for it.

When Heat Mitigation Actually Matters

For a lot of Michigan decks, heat mitigation is less critical than the manufacturers’ marketing might suggest. A deck that faces north, gets significant tree shade, or is only in direct sun for a few hours a day is unlikely to reach the temperatures that make barefoot comfort a real concern, regardless of color.

Where heat mitigation becomes genuinely important is the combination of two factors: a deck in full or near-full sun, and a desire for a darker color. If your deck faces south or west and gets unobstructed afternoon sun, and you’re drawn to the richer, darker board colors that are currently popular, heat mitigation technology is a real consideration worth paying for. In that scenario, choosing a product line with SunComfortable or Advanced PVC technology in a medium-to-dark color will perform meaningfully better underfoot than a standard composite board of the same color.

If you’re choosing a lighter color regardless, the benefit of heat mitigation narrows considerably. You’ll still get a cooler board than a darker color from a premium line, but the color choice itself is doing most of the work.

Trex: SunComfortable Technology Across Three Lines

Trex introduced their SunComfortable heat-mitigating technology in the Transcend Lineage collection in 2022, their premium offering with on-trend, understated colors and a 50-year warranty. Since then, they’ve expanded it. As of 2025, SunComfortable technology is available in select colors across Trex Select and Trex Enhance as well, making it accessible at lower price points than when it launched.

A few things worth knowing about the Trex lines:

  • Trex Transcend Lineage: The line where SunComfortable technology is most fully implemented. Designed specifically with heat it mind, it’s a great choice for homeowners with small children or pets. Backed by a 50-year warranty. This is the line to specify when heat mitigation is a primary concern.
  • Trex Transcend: Trex’s best-selling line with a wide range of colors and a 50-year warranty. Does not carry the same heat-mitigating technology as Lineage, but remains a strong performer. Color choice matters here more than in the Lineage line.
  • Trex Select: Mid-tier option with a 35-year warranty. Select now includes SunComfortable technology in several of its color offerings as of 2026.
  • Trex Enhance: Trex’s entry-level composite line with a 25-year warranty. Two heat-mitigating colors (Honey Grove and Tide Pool) were added to the Enhance line in 2024, making this the first time heat mitigation technology has been available at Enhance’s price point.

Trex is clear in their materials that even Transcend Lineage boards will get hot on a hot day. Trex cites reductions of up to 35 degrees Fahrenheit in their laboratory testing, though it’s worth knowing what that comparison actually involves: their test compares Lava Rock (a dark color, without SunComfortable) to Salt Flat (a light color, with SunComfortable). That means the 35-degree figure reflects both the technology and a significant color difference working together, not the technology alone. Barefoot caution on a hot summer afternoon is still warranted, particularly for young children.

TimberTech: Advanced PVC

TimberTech takes a different material approach. Their heat-performing products are Advanced PVC boards rather than wood-composite, which gives them a different set of performance characteristics. TimberTech’s Advanced PVC collections report surface temperatures up to 30 degrees cooler than many competitive composite products, and that performance extends across their Vintage, Landmark, and Harvest collections.

TimberTech’s own guidance echoes what Trex University teaches: even within the Advanced PVC line, lighter colors will outperform darker ones on heat. The material science helps, but color still drives most of the outcome. TimberTech Advanced PVC also comes with a 50-year fade and stain warranty and a lifetime limited product warranty, making it a great long-term investment.

One practical note on PVC vs. composite: PVC boards can heat up faster than composite in the first few minutes of sun exposure. Given time, though, standard composite boards typically get hotter overall. If you’re evaluating samples, TimberTech recommends letting the samples sit in full sun for at least two hours before comparing temperatures for an accurate read.

Don’t Overlook Shade

Whatever material and color you choose, shade structures are an effective and often underutilized tool for heat management. A pergola with a retractable canopy, a sail shade, or even a well-positioned umbrella can dramatically reduce the surface temperature of any deck board in direct sun. We install Trex Pergola systems, which include motorized and manual retractable canopy options, and they’re a popular addition for homeowners who want the flexibility to open up the deck on mild days and block the sun when it’s intense.

If heat is a significant concern for your project, the conversation about shade is worth having alongside the conversation about materials and color. In many cases, a combination of a mid-range board in a lighter color, strategic use of outdoor carpet, plus a shade structure gets you further than an expensive heat-mitigating product line alone.

Heat Mitigation at a Glance: Trex and TimberTech Lines

Product Line Heat Mitigation Tech Warranty Best For
Trex Transcend Lineage Yes (SunComfortable) 50 years Full sun, darker colors, premium build
Trex Transcend No 50 years Wide color range, proven performance
Trex Select Select colors (SunComfortable) 35 years Mid-range budget, heat-conscious color choices
Trex Enhance Two colors (SunComfortable) 25 years Entry price point with heat mitigation option
TimberTech Advanced PVC (Vintage, Landmark, Harvest) Yes (PVC construction) 50 years + lifetime product Premium heat and moisture performance, realistic wood aesthetics

Frequently Asked Questions

Does heat mitigation technology mean my deck won’t get hot? No, and any manufacturer that implies otherwise is overselling it. All deck surfaces get hot in direct sun. Heat mitigation technology reduces how hot compared to standard composite boards of a similar color, and it does so meaningfully. But on a hot July afternoon with the sun bearing down, you’ll still want footwear, especially for young children.

Is color really more important than the product line when it comes to heat? Yes, according to both the manufacturers and what we’ve learned through Trex University. A lighter color from a standard line will typically outperform a darker color from a premium heat-mitigating line. The ideal combination is a lighter color and a product with heat mitigation technology built in.

My deck is mostly shaded. Do I need to worry about heat mitigation? Probably not as a primary concern. If your deck is under a tree canopy or on a north-facing exposure that doesn’t get significant direct sun, heat is unlikely to be a limiting factor in your material or color selection. Focus on the colors and materials you prefer.

Does my deck’s orientation affect how hot it gets? Significantly. South- and west-facing decks get the most direct sun, particularly in the afternoon when temperatures are highest. If your deck faces south or west and is unobstructed, heat mitigation is worth paying attention to. North- and east-facing decks get considerably less intense sun exposure.

Can you help me figure out whether heat mitigation matters for my specific deck? Yes. During our free on-site consultations, we look at your deck’s orientation, sun exposure, and the color palette you’re drawn to, and we give you an honest read on whether a heat-mitigating product line is worth the investment for your situation. Sometimes it is. Sometimes color selection alone gets you where you need to be.

Let’s Talk Through Your Options

If you’re weighing decking materials and heat is on your mind, we’d be glad to walk through it with you on-site. Our free consultations take about 45 to 60 minutes, and we bring sample boards so you can see and feel the color options in your actual yard.

Book your free estimate today. We serve Ann Arbor, Saline, Dexter, Chelsea, Pittsfield Township, Ypsilanti, and the surrounding Washtenaw County area.

Read more

Spring Cleaning

Spring Deck Cleaning: Tips & Tricks to Make It Easy…er

Highlights from this Article:

  • Wood and composite decks have genuinely different cleaning needs. It’s important to use the correct method so you avoid scratches or damage.
  • Spring cleaning is also your best opportunity to catch soft spots, rot, and loose fasteners before they become expensive repairs.
  • Pressure washing is fine for both deck types at low settings (1,500 PSI or below) with a fan-tip nozzle, but technique matters.
  • Wood decks need to be stained or sealed after cleaning. Composite decks don’t. Once clean, they’re ready for the season.
  • Shady yards common in Ann Arbor are more prone to mildew on composite surfaces; treat it promptly with a manufacturer-approved cleaner.

Skip down to the FAQs or the Composite Deck Cleaning section.

Every spring, it’s the same story. The snow melts, the days get longer, and you walk out to your back deck for the first time in months, only to find a winter’s worth of grime, leaf debris, and weathering staring back at you. Before you fire up the grill and pull out the patio furniture, your deck deserves a proper cleaning.

The good news: it’s not as hard as it looks. With the right approach and a few hours on a mild spring day, you can have your deck looking renewed and ready for the season ahead. The key is knowing what your deck is made of, because wood and composite decks have genuinely different needs, and using the wrong method on either one can cause more harm than good.

Cleaning a Wood Deck

Wood decks reward careful attention. When you clean yours thoughtfully each spring, you’re not just improving its appearance. You’re extending its life and setting it up for a successful staining or sealing season.

What You’ll Need

  • A stiff-bristle brush (avoid wire brushes, which can damage wood fibers)
  • A garden hose or pressure washer (more on pressure washing below)
  • A dedicated wood deck cleaner or a DIY solution of warm water, dish soap, and white vinegar
  • Rubber gloves and eye protection
  • A putty knife or paint scraper for stubborn debris

Step-by-Step

Start with a thorough sweep. Before any water touches your deck, sweep away leaves, dirt, and debris, paying special attention to the gaps between boards. Debris trapped in those gaps holds moisture against the wood, which accelerates decay. A putty knife works well for clearing packed-in material.

Inspect as you go. Spring cleaning is the perfect time to look for soft spots, cracked boards, loose fasteners, or signs of rot. Catching these issues early means a simple repair instead of a costly replacement. Press a screwdriver gently into the wood in a few places. If it sinks easily, that board may need attention.

Apply your cleaner. Wet the deck surface with your hose first, then apply your wood deck cleaner according to the product instructions. A quality deck cleaner will break down mildew, algae, and gray weathering. Let it dwell for the recommended time; don’t let it dry on the surface.

Scrub with the grain. Using your stiff-bristle brush, scrub the cleaner into the wood with the grain, not against it. This lifts embedded dirt without roughing up the wood fibers.

Rinse thoroughly. Rinse the entire surface completely, working the water into the gaps between boards. Leftover cleaner residue can interfere with staining or sealing later.

A Word on Pressure Washing Wood

Pressure washing a wood deck is effective but requires care. Keep the pressure at or below 1,500 PSI, use a fan-tip nozzle (never a pinpoint jet), and maintain a consistent distance of at least 12 inches from the surface. Too much pressure can raise the wood grain, leaving the surface fuzzy and actually making it harder to seal properly. When in doubt, a lower setting and a scrub brush will get you there safely.

Don’t Skip the Staining Step

Once your wood deck is clean and fully dry (typically 48 to 72 hours after washing), it’s ready for staining or sealing. This step isn’t optional if you want your deck to hold up through another Michigan year. A quality penetrating stain or sealant protects against moisture, UV damage, and the cycle of freezing and thawing that takes a real toll on untreated wood.

Cleaning a Composite Deck

Here’s the good news composite deck owners have been waiting for: cleaning your deck is significantly easier than cleaning a wood deck. Composite materials don’t absorb moisture, won’t rot, and resist mold and mildew far better than natural wood. That said, composite decks do accumulate dirt, pollen, and organic debris, especially in shady yards, and benefit from a proper spring refresh.

What You’ll Need

  • A soft-bristle brush or deck mop
  • A garden hose
  • A composite-approved deck cleaner (check your manufacturer’s recommendations)
  • Mild dish soap for everyday dirt
  • Rubber gloves

Step-by-Step

Clear the deck completely. Remove all furniture, planters, and mats before you begin. Rubber-backed mats left on composite decking can trap moisture and promote mildew growth. This is a good time to let the surface fully air out.

Sweep and rinse. Remove loose debris and give the surface a good rinse with your garden hose. For most composite decks, this alone handles a surprising amount of surface grime.

Clean with a composite-safe cleaner. Apply your cleaner and scrub gently with a soft-bristle brush, working with the board’s grain pattern. Composite decking can scratch if you scrub aggressively or use an abrasive pad; a gentle hand and the right brush gets the job done without the risk.

Address mold and mildew promptly. Shady yards, common in many Ann Arbor neighborhoods, can encourage mildew growth on composite surfaces. Most composite manufacturers approve a diluted solution of white vinegar and water, or their own branded cleaner, for mildew treatment. Treat affected areas and rinse thoroughly.

Rinse completely. Finish with a full rinse to clear away cleaner residue, working the water into the board gaps. Allow the deck to dry fully before returning furniture.

Pressure Washing Composite

Most composite manufacturers permit pressure washing at low settings (typically 1,500 PSI or below) using a fan-tip nozzle. Always check your specific product’s guidelines, as some manufacturers void warranties if pressure washing instructions aren’t followed. Keep the nozzle moving and maintain a consistent distance to avoid streaking.

No Staining Required

Unlike wood, composite decking never needs to be stained or sealed. That’s one of its most appealing qualities. Once it’s clean, it’s ready for the season. Simply return your furniture, add a potted plant or two, and you’re done.

A Few Tips That Apply to Both Deck Types

  • Clean on a mild, overcast day when possible. Direct sun can dry cleaners too quickly before they’ve done their work.
  • Work in manageable sections rather than treating the whole deck at once, especially on larger decks.
  • Don’t overlook the railings, posts, and stairs. These surfaces accumulate just as much winter grime as the decking boards themselves.
  • Check underneath the deck while you’re at it. Clearing debris from under your deck improves drainage and reduces the conditions that accelerate wood rot in the structural framing.

Frequently Asked Questions

How often should I clean my deck in Ann Arbor? A thorough spring cleaning is the most important annual maintenance task for any deck. Many homeowners also do a lighter fall cleanup (clearing leaves and debris before winter, to prevent organic material from sitting against the deck surface through the freeze-thaw months. In shady yards where mildew is more likely, a mid-summer rinse can also help composite decks stay looking their best.

Can I use a pressure washer on my composite deck? Most composite manufacturers permit pressure washing at low settings (typically 1,500 PSI or below) using a fan-tip nozzle. Always check your specific product’s care guidelines before you start, since some manufacturers include pressure washing instructions in their warranty terms. Keep the nozzle moving and maintain a consistent distance to avoid streaking or surface damage.

What’s the best cleaner for a wood deck? Purpose-made wood deck cleaners are your safest bet; they’re formulated to break down mildew, algae, and gray weathering without damaging wood fibers. For light everyday cleaning, a solution of warm water, dish soap, and white vinegar works well. Avoid bleach-based cleaners, which can strip natural wood color and degrade wood fibers over time with repeated use.

How long do I need to wait after cleaning my wood deck before staining or sealing it? Generally 48 to 72 hours of dry weather after washing. The wood needs to be fully dry before stain or sealer can penetrate properly. Applying it too soon traps moisture in the wood, which can lead to peeling and uneven finish. Check the weather forecast before you start your cleaning project and plan accordingly.

My deck has some soft spots: is that a cleaning problem or something more serious? More serious, unfortunately. Soft spots in deck boards are a sign of wood rot, which no amount of cleaning can reverse. Spring is actually the ideal time to catch these issues before the season begins. If you find soft spots, loose boards, or fasteners that have worked their way up, it’s worth having a professional take a look before the problem spreads to the structural framing underneath.

Does cleaning a composite deck void the warranty? Not if you follow the manufacturer’s care guidelines. Most composite warranties actually require regular cleaning as a condition of coverage. Neglecting the deck can void protection, not the cleaning itself. Using harsh chemicals, abrasive scrubbers, or a pressure washer above the recommended PSI are the things most likely to create warranty issues. When in doubt, stick to manufacturer-approved cleaners and methods.

When Cleaning Isn’t Enough

Sometimes spring reveals more than just a dirty deck. It reveals a deck that needs attention beyond what a good scrubbing can fix. Soft spots, significant graying, loose or damaged boards, and deteriorating railings are all signs that it’s time for a professional assessment.

At Ann Arbor Decks, we’re happy to take a look. We’ve been helping Washtenaw County homeowners maintain, repair, and rebuild their outdoor spaces since 2006, and we love helping families get the most out of what they already have, not just what they might build next.

If your spring cleaning uncovers something you’re not sure about, reach out for a free consultation. Sometimes a small repair today saves a major replacement down the road.

Read more

Carpenter Bees

Carpenter Bees Damaging Your Old Wood Deck or Gazebo? Here Are Some Solutions.

Highlights from this Article:

  • Carpenter bee damage to cedar decks, railings, posts, and gazebos is increasingly common across Washtenaw County. Our crew sees it on job sites year-round.
  • Unsealed, unpainted, or weathered cedar is the most vulnerable. Properly finished wood is significantly more resistant.
  • Damage often goes unaddressed for months or years. By which point the structural impact can be serious.
  • Composite decking is immune to carpenter bees. For homeowners who’ve dealt with repeated damage, resurfacing with composite is often the right long-term answer.

Skip down to the wood vs. composite comparison or the FAQs.

Our owner, Josiah Shurtliff, has been building decks in the Ann Arbor area since 2006. Over the past several years, he and our crew have noticed a pattern that’s hard to ignore. Carpenter bee damage to wood decks, railings, posts, and backyard structures is showing up more frequently, and by the time most homeowners call us, it’s been going on longer than they realized.

Here’s how to recognize carpenter bee damage, why cedar is particularly vulnerable, what it means for your deck structurally, and what your options are when you find damage.

What Carpenter Bees Actually Do

Carpenter bees are large, heavy-bodied bees that look similar to bumblebees. Unlike bumblebees, they don’t live in colonies. The females bore into wood to create individual nesting galleries. The entry hole is almost perfectly round, about half an inch in diameter (the size of a small coin, and typically appears on the underside or end grain of a board where it’s less exposed to weather.

Once inside, the bee turns and tunnels with the grain of the wood, sometimes extending several feet. That tunnel becomes a nesting chamber. The momma bee lays eggs, seals the chamber, and the next generation emerges the following spring, often returning to the same structure to bore new tunnels nearby. Year after year, the damage compounds.

There’s a secondary damage problem that many homeowners don’t know about: woodpeckers. Once carpenter bee larvae are established inside a piece of wood, woodpeckers will hammer into it to get at them. A post or railing that a carpenter bee has been working on for a season or two can end up looking like it lost a fight with a power drill (holes, splits, and splintered wood that goes well beyond the original bee entry points).

Why Cedar Is So Vulnerable

Cedar is a beautiful decking material and naturally rot-resistant, but it has a well-known vulnerability to carpenter bees: when it’s left bare, weathered, or inadequately finished, it’s one of their preferred targets. Carpenter bees strongly prefer untreated, unpainted, unfinished softwood, and cedar that hasn’t been properly sealed, stained, or painted is essentially an open invitation.

This is something Josiah and our crew see repeatedly on assessments. A homeowner puts in a cedar deck, enjoys it for a season or two, and either skips the initial finishing or lets it lapse. Within a few years, the railings and posts are dotted with entry holes. By the time we’re called out, the damage has often spread well beyond the surface boards into the posts and structural framing, components that are harder and more expensive to replace than decking or fascia.

Pressure-treated pine is less attractive to carpenter bees due to the chemical treatment, but it’s not entirely immune, particularly on older decks where the treatment has weathered and the wood has dried out and cracked.

Why Homeowners Often Don’t Act Quickly

We get carpenter bee damage calls year-round, but the actual damage happens in spring when female bees are most active. The reason we hear from homeowners in every season is that most people don’t act on it right away.

Part of that is the nature of the damage itself. The entry holes are small and sometimes in locations that aren’t immediately obvious (on the underside of a rail cap, at the base of a post, on the fascia boards that frame the deck’s edge). A homeowner might notice a hole or two, assume it’s minor, and intend to deal with it later. Meanwhile the bees are extending their tunnels, laying eggs, and the woodpeckers are following.

By the time “later” arrives, what might have been a resurfacing project has become a structural repair or a full replacement. We’re not saying this to alarm anyone. We’re saying it because catching damage early genuinely matters, and we’d rather see people act on it sooner than wait.

What We Find on Assessments

When we’re called out for a consultation, here’s what we’re looking at:

  • Deck boards and railings: Entry holes, surface damage, and softness or sponginess in the wood around affected areas.
  • Posts: Posts are a particular concern because they’re structural. A post that’s been extensively tunneled can lose significant load-bearing capacity. We probe posts carefully, especially at the base and cap where bees tend to concentrate.
  • Ledger board and framing: If bees have been active long enough, we check whether the damage has reached the framing. This is where things get more serious structurally.
  • Gazebos and pergolas: We’re seeing a lot of carpenter bee damage on gazebos and wood pergolas, particularly on exposed rafter tails, posts, and any bare cedar or pine components. These structures often get less maintenance attention than the main deck.

Your Options When You Find Damage

Full Resurfacing with Composite

For homeowners who have dealt with significant carpenter bee damage, or who simply don’t want to deal with the ongoing maintenance and vulnerability of wood, resurfacing with composite decking is the most permanent solution. Composite boards are made from wood fiber and plastic; carpenter bees have no interest in boring into them. A composite deck surface, composite or PVC railings, and properly treated or composite post systems eliminate the carpenter bee problem for the life of the deck.

We’ve done a number of these projects in Washtenaw County where the trigger was exactly this: a cedar deck with recurring carpenter bee damage, a homeowner who’s tired of fighting it, and a decision to resurface with composite once and not think about it again. It’s a sound investment, particularly when the framing is still in good shape and a full replacement isn’t necessary.

Repair and Refinish the Existing Wood

Where the damage is caught early and the structural framing is sound, homeowners can replace damaged boards, repair or replace affected posts, fill existing holes, and refinish the wood with a quality paint or solid stain. Properly finished cedar (well-sealed and maintained) is significantly more resistant to carpenter bees than bare or weathered wood.

This is a viable path, but it comes with an honest caveat: it requires follow-through on maintenance. If the deck goes bare again, the bees will be back. We’ll tell you this plainly when we give you your options.

Wood vs. Composite: Carpenter Bee Vulnerability at a Glance

Bare or Weathered Cedar Properly Finished Cedar Composite Decking
Carpenter bee risk High Moderate (requires upkeep) None
Maintenance required Immediate Regular sealing and staining Minimal
Structural risk if ignored Significant over time Lower with proper maintenance Not applicable
Long-term solution No Only with consistent upkeep Yes

Frequently Asked Questions

How do I know if I have carpenter bee damage? Look for round entry holes approximately half an inch in diameter, typically on the underside of horizontal boards, the tops of rail caps, or the faces of posts. You may also see coarse sawdust (called frass) below entry points, or yellow staining from bee waste near holes. If woodpeckers have been active on your deck or pergola, that’s another strong indicator. They’re usually following the bees.

Are carpenter bees dangerous to people? Generally no. Male carpenter bees can be territorial and will hover aggressively near their nesting sites, but they have no stinger. Female carpenter bees do have stingers but are docile and rarely sting unless directly handled. The danger is to your wood structures, not to you.

Can I treat the existing holes myself? You can fill holes with wood filler or steel wool and caulk as a temporary measure, and insecticide dust applied to active holes in spring can kill larvae before they emerge. But DIY treatment addresses the symptom, not the underlying vulnerability. Bare, unfinished wood will attract new bees the following season. If the damage is more than superficial, a professional assessment is worth it.

Does composite decking really eliminate the problem? For the deck surface and composite or PVC railing components, yes. Carpenter bees bore into wood fiber; they have no interest in composite or PVC materials. If your post system uses wood posts (even on a composite deck), those should be addressed. We can discuss post options during a consultation.

How quickly does carpenter bee damage become a structural problem? It depends on the scope of activity and how long it’s been going on. A single season of moderate activity on a few boards is usually a surface issue. Several seasons of heavy activity on posts or framing members can meaningfully compromise structural integrity. This is why we encourage homeowners not to wait once they notice it.

Is this a problem specific to the Ann Arbor area? Carpenter bees are common throughout the eastern United States, but our crew has noticed an uptick in damage calls across Washtenaw County over the past several years. Whether that reflects a growing bee population, more wood decks reaching the age where unsealed wood becomes attractive, or simply greater awareness, we can’t say for certain. What we can say is that it’s a real and growing part of what we’re seeing on assessments in this area.

Think You Might Have Carpenter Bee Damage?

If you’ve noticed holes in your deck railings, posts, or backyard structures, it’s worth having someone take a look before the next spring season brings another round of activity. Our free on-site assessments take about 30 to 45 minutes, and we’ll give you a clear, honest picture of what we find along with your options.

Book your free assessment today. We serve Ann Arbor, Saline, Dexter, Chelsea, Pittsfield Township, Ypsilanti, and the surrounding Washtenaw County area.

Read more

Screened Porch vs 3-4 Seasons

Screened Porch, Three-Season Room, or Four-Season Room: Which One Is Right for Your Michigan Home?

Highlights from this article:

  • Screened porches give you fresh air and bug-free, rain-free outdoor living at the most accessible price point.
  • Three-season rooms add windows and insulation for comfortable use through spring, summer, and fall.
  • Four-season rooms are fully climate-controlled additions you can enjoy year-round, even midwinter in the Mitten State.
  • The right choice depends on how you want to use the space and what you're willing to invest.

~Skip down to the quick comparison table or the FAQ's.~


As you start researching porches, screened rooms and sunroom additions, the terminology can get confusing fast. What exactly is the difference between a screened porch and a three-season room? Is a four-season room just a fancy sunroom? And which one actually makes sense for your home, your family, and your budget?

Let's walk through each option clearly so you can make a confident, informed decision.

Screened Porches: Fresh Air Without the Bugs and Direct Sunlight

A screened porch is an outdoor living space enclosed with a roof and screen panels — like Screeneze Screen Systems, for example — set within a structural frame. It keeps insects out while letting in breezes, natural light, and the sights and sounds of your yard. It typically includes a ceiling fan, but no other climate control.

Many screened porches are essentially covered decks that shield you from direct summer sun, rain and bugs.

What makes a screened porch special is that it keeps you connected to the outdoors. You hear and smell the rain. You feel the evening air. You watch the seasons change from a comfortable chair. For many families, this authentic connection to the outside is exactly what they're after, and no amount of glass can replicate it.

Best for:

  • Homeowners who love the feel of being outside but want a deck area with relief from insects and direct sunlight
  • Families who want an affordable outdoor living upgrade
  • Outdoor hospitality and dining in summer without concern for rain
  • Yards with beautiful natural settings worth staying connected to
  • Late spring, summer and early fall use in Michigan's climate

What to know about Screened Rooms:

Screened porches are generally the most budget-friendly of the three options. They don't require HVAC systems, electrical heating, or the heavy insulation that enclosed rooms demand. On very hot summer days or cold fall evenings, comfort depends on the weather — there's no climate control. And in Michigan, screened porches typically are not used during the winter months.

Some screened porches employ floor-to-ceiling screens all around. Others are designed with knee walls. A knee wall is a short solid wall — typically two to three feet high — that runs along the base of the porch enclosure before the screen begins above it. Knee walls block some wind and blowing rain at ground level, adding a measure of weather protection that floor-to-ceiling screening doesn't provide. Knee walls don't substitute for windows or insulation, but they can make a real difference on blustery days.

The floor beneath your screened porch also matters more than many homeowners expect. A ground-level porch can sit on a solid cement slab foundation, which does a reasonable job of retaining some warmth and providing a seamless, solid feel underfoot. Raised porches, however, are often built on a typical composite decking floor — and because composite deck boards have small gaps between them, cold air moves through more freely from below. One option is to go for tongue-and-groove composite porch planks (like these TimberTech porch planks), which combine the longevity of composite with a more seamless barrier to bugs and the elements.

TimberTech Porch Planks

Three-Season Rooms: The Sweet Spot for Most Families

A three-season room takes the screened porch concept a step further by replacing screen panels with windows — usually single-pane glass or vinyl-framed windows that open and close. The result is a space that stays comfortable through a much wider range of temperatures, shielding you from wind, rain, and the chill of early spring or late autumn evenings.

Think of it as a room that lives between indoors and outdoors. You're protected from the elements, but the space isn't tied into your home's heating or cooling. You might use a ceiling fan or infrared heaters in this area. On a crisp October afternoon in Ann Arbor — the kind where the maples are turning and the air smells like leaves — a three-season room is an extraordinarily pleasant place to be.

Best for:

  • Homeowners who want to extend their outdoor living season significantly
  • Families who enjoy the transition seasons (spring and fall) as much as summer
  • Those who want more weather protection than a screened porch without the full investment of a four-season addition
  • Homeowners who plan to use the space for dining, reading, or relaxing — not as a primary living area

What to know about Three-Season Rooms:

Three-season rooms aren't designed for Michigan winters, and they don't tie into your home's central HVAC system. But that doesn't mean you're limited to whatever temperature the weather provides. Supplemental heaters work well in these spaces — infrared heaters in particular are a popular choice. A well-placed infrared heater can meaningfully extend your comfortable season into colder fall evenings. Many families find this a perfectly reasonable trade-off: They use the room from roughly April through October and consider it an outdoor space that's simply more protected.

Three-season rooms typically cost more than screened porches but less than full four-season additions.

Four-Season Rooms: A True Room Addition

A four-season room — sometimes called an all-season room — is a fully conditioned living space. It's insulated to the same standard as the rest of your home, connected to your HVAC system (or equipped with its own), and designed to be comfortable in January just as much as July.

This is a genuine addition to your home's living square footage. Families use four-season rooms as dining/entertainment rooms, home offices, playrooms, craft or art spaces, reading rooms, and informal living areas. Many install gas fireplaces to create an even more cozy, "Up North," cabin-like feel. The abundant natural light that defines these spaces makes them feel uplifting year-round — especially during Michigan's gray winter months when sunlight feels like a gift.

Best for:

  • Homeowners who want a year-round living space with abundant natural light
  • Families who want more functional square footage for their home
  • Those looking to increase their home's resale value
  • Anyone who finds Michigan winters long and wants a bright, warm, at-home retreat

What to know about Four-Season Rooms:

Four-season rooms represent a more significant investment than screened porches or three-season rooms. They require proper insulation and climate control, all of which add to the build cost. They often feature special design elements like tile or luxury vinyl plank flooring, pine shiplap like Woodtone or tongue-and-groove cedar ceilings, and built-in gas fireplaces. Because they function as true living spaces, they also add meaningfully to your home's appraised value. If you're planning to stay in your home for years to come, you'll find the investment more than worthwhile.

How They Compare at a Glance

Screened Porch Three-Season Room Four-Season Room
Usable Season Spring–Fall Spring–Fall (extended) Year-round
Climate Control None None Full heat \& AC
Connection to Outdoors High — open air feel Moderate Lower — fully enclosed
Relative Cost $ $$ $$$
Adds to Home Value Yes Yes Yes (most significantly)
Best Use Relaxing, dining al fresco Dining, reading, entertaining Living, working, year-round family space

So Which One Is Right for You?

Here's a simple way to think through the decision:

Choose a screened porch if you love the feeling of being outside in the summer, and you want to preserve that connection to your yard and the natural world around it. If your primary frustration is insects or rain rather than cold weather, a screened porch delivers tremendous value at a more accessible price.

Choose a three-season room if you want to extend your outdoor living season meaningfully — catching those gorgeous Ann Arbor spring and fall days — without committing to a full home addition. It's the choice that makes the most sense for families who think of the space primarily as an outdoor retreat with weather protection.

Choose a four-season room if you want a room, not just a porch. If you're imagining morning coffee in February with snow on the ground, a home office bathed in natural light, or a playroom your kids will actually use all year — a four-season room is built for that.


Frequently Asked Questions

What's the most popular choice for Ann Arbor homeowners: screened porch, three-season room, or four-season room?
Screened porches and three-season rooms are both very popular in Washtenaw County, largely because Michigan's spring and fall seasons are so beautiful. Both options let you enjoy them comfortably. Four-season rooms appeal most to families who want true year-round living space and are ready to invest in a full home addition.

Can I convert a screened porch into a three-season or four-season room later?
Sometimes, yes, but it depends heavily on how the original structure was built. A screened porch that was designed with future enclosure in mind (adequate footings, proper framing) may be a reasonable candidate for conversion. One not originally designed for it often requires significant structural work. It's worth discussing your long-term vision with your contractor before you build, so the initial structure doesn't close doors later.

Can I convert my existing deck into a screened porch?
The answer almost every time is "no," unfortunately. We must be sure that the structure will be safe and will stand the test of time, so we will demolish your existing deck and build a new room for you that's engineered to last. Most decks have footings, posts and beams that are inadequate to bear the weight of walls, ceiling and roof. Screened porches require building permits, plan drawings with footing/structural details, and careful inspection. We take our role as contractor very seriously, so we need to vouch for every footing and structural detail from the bottom up.

How much warmer does a three-season room stay compared to a screened porch on a cold fall evening?
Quite a bit warmer — closed windows eliminate wind chill and block the cold air that flows freely through screens. Add a supplemental infrared heater and you can comfortably extend your season well into October and November in Michigan. That said, a three-season room will still track toward outdoor temperatures on very cold days.

Do four-season rooms add to my home's resale value?
Generally speaking yes, and more significantly than screened porches or three-season rooms. Because a four-season room functions as true conditioned living space, it typically counts toward your home's finished square footage, which directly affects appraised value. The actual return on investment varies by market, of course.

What's the difference between a four-season room and a sunroom?
The terms are often used interchangeably, but there's a meaningful distinction. A true four-season room is fully insulated and climate-controlled to the same standard as the rest of your home. "Sunroom" is a looser term that sometimes describes spaces that are enclosed and light-filled but not fully insulated. Sunrooms often feature floor-to-ceiling glass on three sides. When you're getting quotes, it's worth asking contractors exactly what insulation, glazing, and climate control is included.


Let's Talk Through Your Vision

At Ann Arbor Decks, we've helped Washtenaw County families build screened porches, three-season rooms, and four-season additions since 2006. We know how Michigan's climate shapes these decisions, and we love helping homeowners think through not just what they can build, but what will genuinely improve their daily life.

Our on-site consultations take just 45 to 60 minutes. We'll visit your home, listen to how you want to use the space, and give you a clear, honest picture of your options.

Contact us today.

Read more